We all want to sound good on podcasts. Whether you’re hosting your own show or are just a guest, it’s important to sound professional.
Of course, most people don’t want to spend a lot on sounding good. This guide will help you understand how to improve your sound quality to the level that makes you happy without breaking the bank.
The first thing you need to do is buy a decent external microphone. You don’t have to spend a lot on a microphone when you’re getting started, but you definitely don’t want to record into AirPods or your laptop’s microphone.
The Blue Yeti is a podcaster’s favorite but, as a condenser mic, it will pick up more sounds from around you. Many podcasters prefer dynamic mics that don’t pick up as many of these sounds; the Rode Podcaster is a great choice and this Audio-Technica option is less expensive. (These Amazon links are affiliate links.)
With a good microphone in hand, now you need to select the best location in your home or office to record. This is tricky; we don’t all have a separate room we can convert into a studio. Most of us don’t spend all day podcasting, either, so our podcast “studio” is mainly used for something like sleeping or eating.
When you’re just getting started, one of my favorite hacks is to record in a walk-in clothing closet. The clothes absorb the echo and produce a nice, rich sound. My wife started recording her popular podcast in a closet. It sounded great but wasn’t the most comfortable place to record!
I’ve set up a few podcast “studios” over the years as we’ve moved from house to house. My wife and I typically share this studio, but I recently increased the number of podcasts I recorded and wanted to convert my home office into a studio, too.
You start running into problems when you create a studio that doesn’t have walls of clothes. Most rooms produce an echo on the recording. Try clapping your hands and seeing what sort of echo you hear and where it’s coming from. Fortunately, there are some things you can do about this.
Fortuitously, I got an email from an acoustics company at the same time I was working on my new studio. Second Skin Auto & Home Insulation is well known for improving the acoustics of automobiles, and it also offers acoustic panels for improving in-home sound. They asked if I’d try out their acoustic panels in return for feedback.
The company’s CEO, Sturgeon, asked me to send over the dimensions of my room and pictures. Then we jumped on a call to discuss the ideal setup for the room.
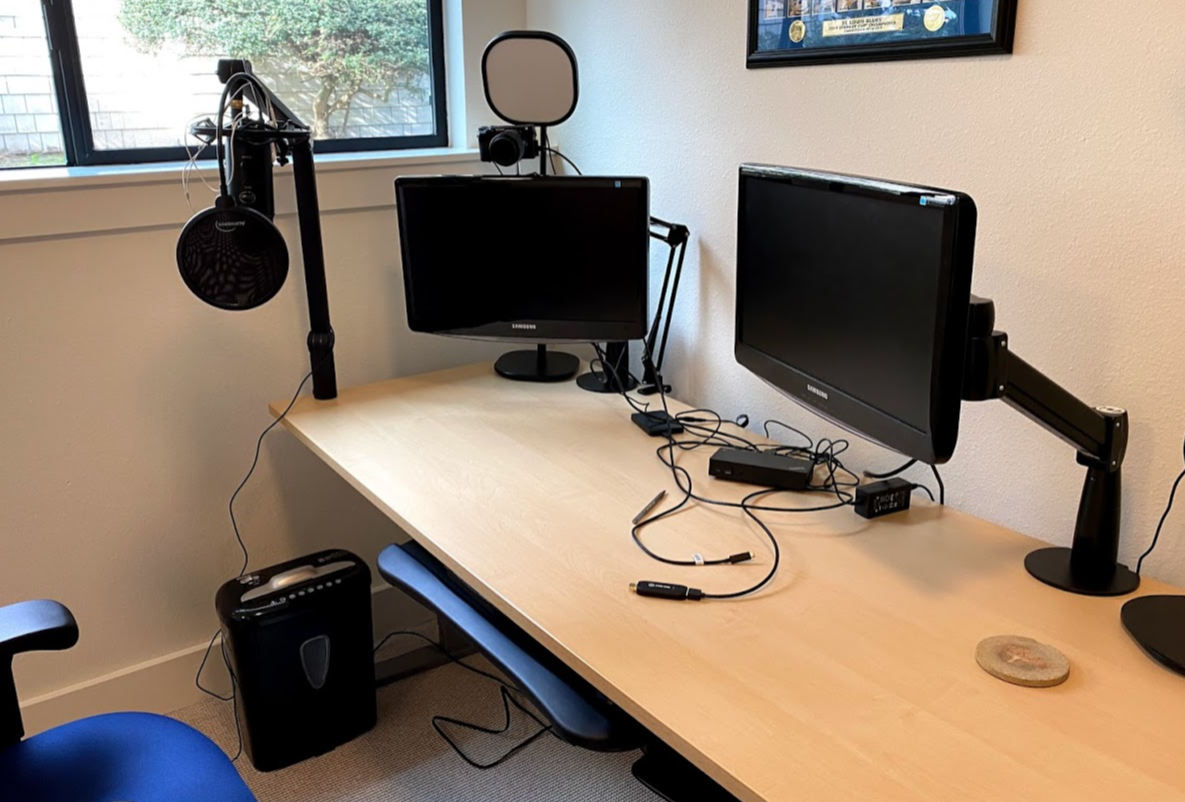
Here’s what my recording setup looked like before adding acoustic panels:

Sturgeon told me I had lots of good stuff going for me. The room has wall-to-wall carpet rather than tile or other hard floors that bounce sound. (If you record in a room with hard floors, consider adding a plush rug.) The room also has a bed with fluffy pillows on it. This absorbs some of the sound.
But my recording setup faces a corner of the room and a window, which could lead to sound bouncing back quickly. That’s a downside.
Also, my recording room doubles as a guest room, so I asked Sturgeon what I could do to improve the sound without making guests feel like they’re sleeping in a sound studio. Sometimes you need a mix of form and function.
Second Skin offers custom colors and designs. So one option is to go all-in with a beautiful design that’s like artwork. (There are some examples here.) Instead, I chose to go with something more subtle: a few well-positioned panels.
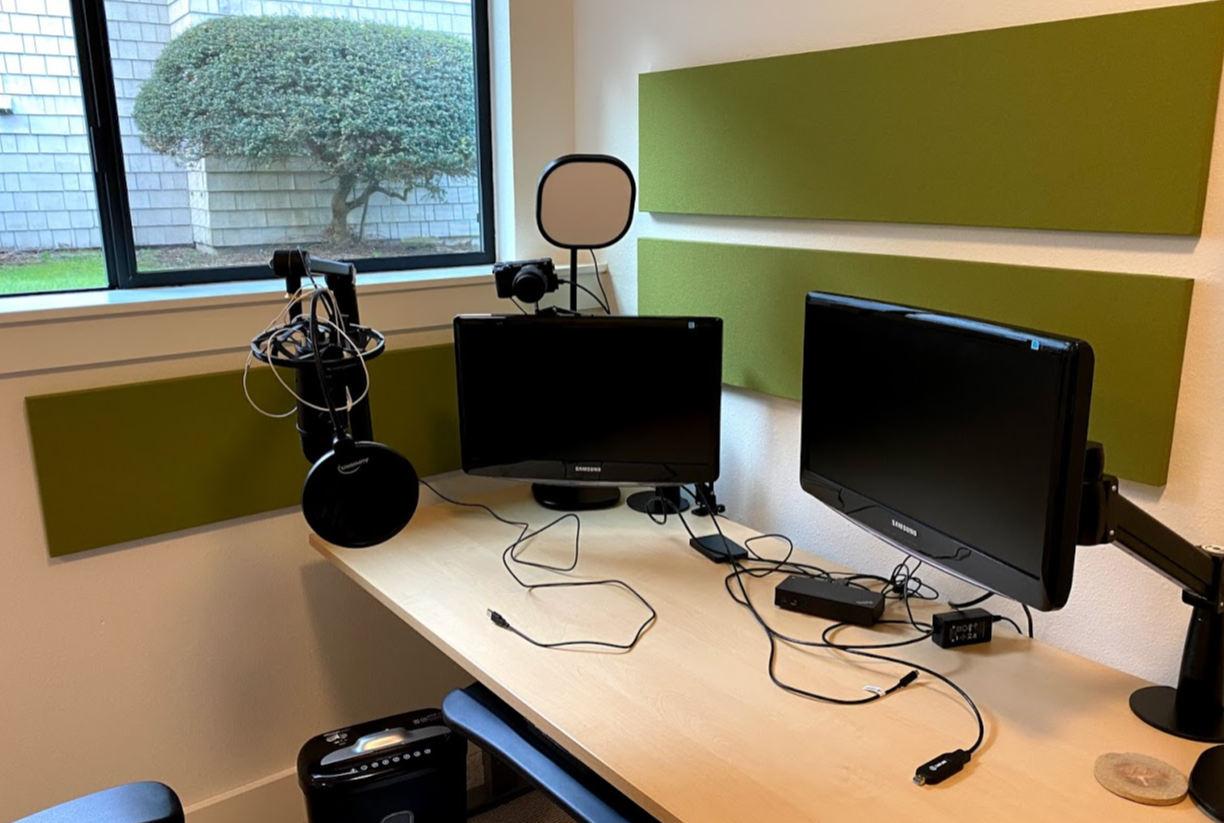
Sturgeon said that I could put one panel to the left over the window. Instead, I decided to affix it just below the window and lower the fabric shade when recording. I also put two panels on the wall in front of me. The strategic placement of these panels improves the sound quality without overpowering the room.
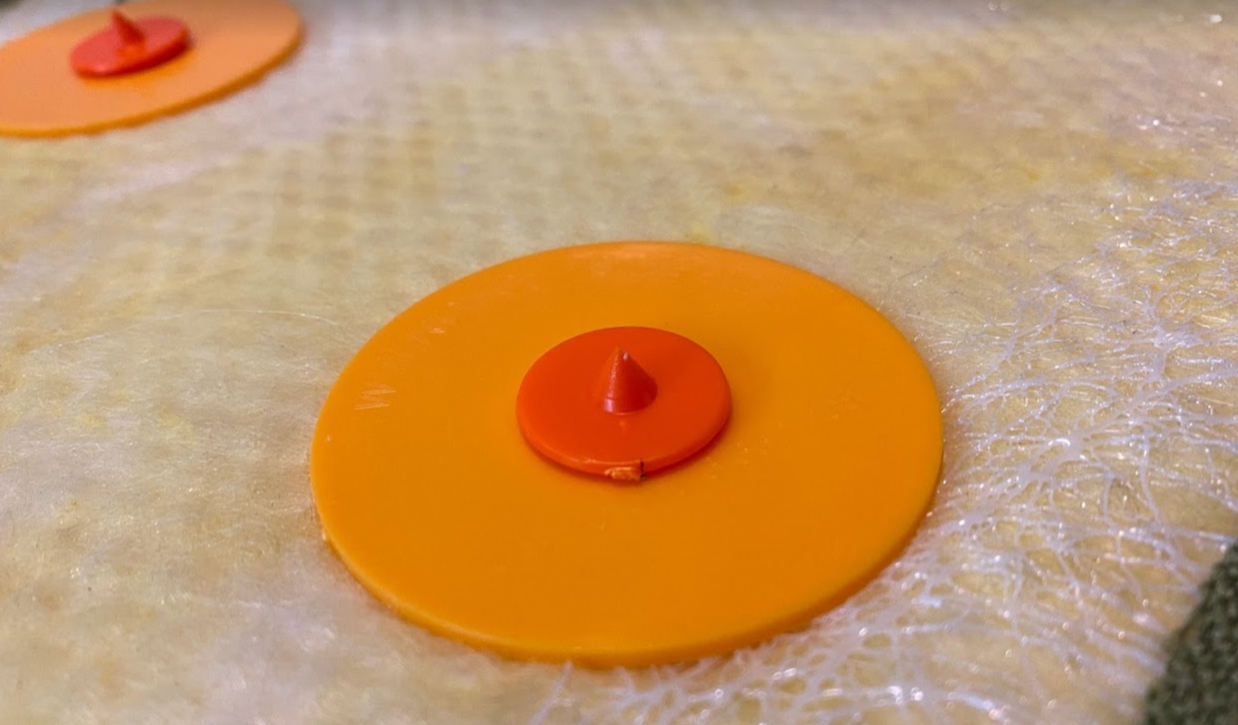
As I said, I’ve hung a lot of panels over the years. Lining them up perfectly and affixing them to the wall isn’t easy. So I was pleasantly surprised about how easy it was to hang Second Skin’s panels thanks to the Rotofast system. You attach anchors in the back of the panels and then insert temporary markers. Here’s what the back looks like with the markers:

Hold the panel up on the wall where you want it (it helps to use a level), push it a bit, and the markers leave indents exactly where you should insert the wall screws. Screw those in and then press the panel into the wall. It’s a lot more idiot-proof than other hanging systems I’ve used.
Here’s the finished setup:

I realize not everyone is into avocado green, but it works with our mid-century home. There are lots of colors and custom options to choose from.
It’s important to note that acoustic panels improve in-room echo but do not keep noise from the outside coming in. Soundproofing a room is another level of effort and doesn’t make sense for my environment.
Many thanks to Second Skin for giving me these panels and for its advice throughout the process. You can order panels from Second Skin here and get them shipped for free in the United States.